How to Update PriviMetrics
In this guide, we will show you how to quickly and safely update PriviMetrics to the latest version. You have two options: manual update or using the Updater.
Method 1: Manual Update
The manual update does not require downloading additional software to your hosting, but it can be more time-consuming because you need to log in to your hosting via File Browser or FTP and replace the files.
Steps:
Go to the official PriviMetrics website: https://weborbiton.com/privimetrics
Select the Self-Hosted plan and click Get Started.
You will be redirected to the WebOrbiton Download Zone: https://dl.wbsrv.icu/?file=privimetrics
Click Download Now and wait for the ZIP file to finish downloading.
Log in to your hosting or FTP account and replace your current PriviMetrics files with the new ones from the ZIP.
⚠️ Important:
All custom changes you made to the code will be overwritten.
If you have modified any files, open them first in a code editor (e.g., VS Code) and save your changes before replacing the files.
Method 2: Update Using the Updater
The Updater is the fastest way to update PriviMetrics and allows you to keep your customizations safe. It requires downloading the Updater files first.
Steps:
Go to your Updater page in your installation:
You will see the PriviMetrics Updater page with a download button.
Instructions on the page:
Download the PriviMetrics Updater
Replace the existing
updater/folder on your hosting or FTP with the downloaded files.
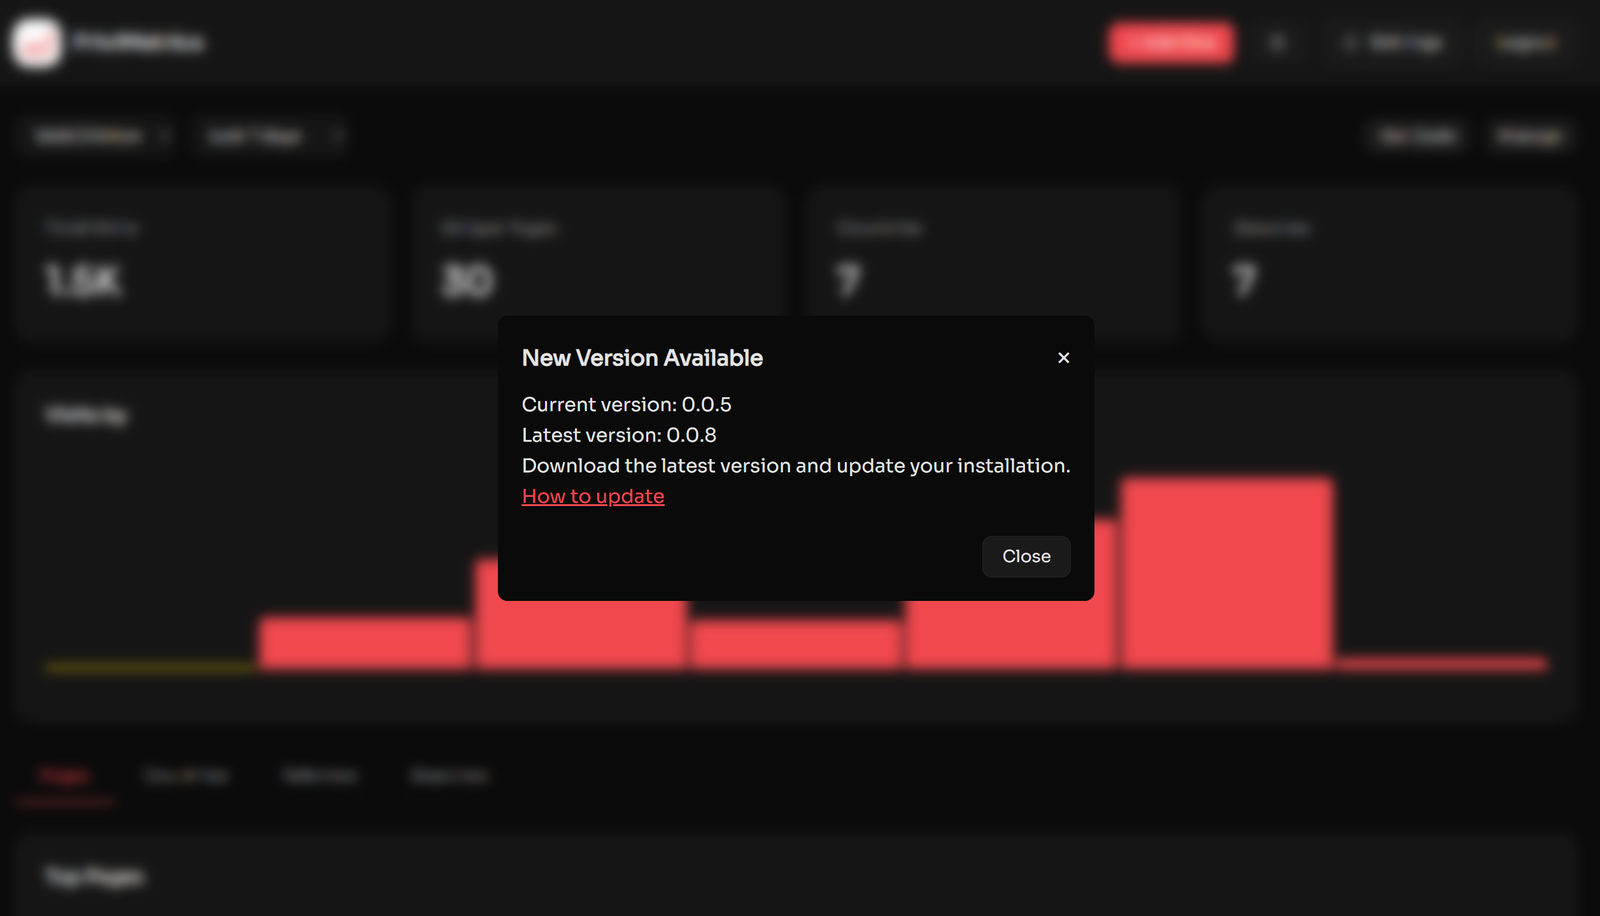
Log in to PriviMetrics, go to Settings → Updater. You will be redirected to the Updater interface.
Click Download Update. The Updater will:
Show what changes will be applied
Warn you if any files are different
Display which files will be added or modified
Review the changes. You will see a list like this:
| File | Status | Lines |
|---|---|---|
| dashboard.php | MODIFIED | 794 lines |
| favicon.ico | UNCHANGED | 52 lines |
| styles.css | MODIFIED | 427 lines |
| version.txt | MODIFIED | 2 lines |
| ... | ... | ... |
Click Select All or manually select which updates to apply, then click Apply Selected Updates.
✅ Advantages of using Updater:
Only files that have changed are updated
Your hosting resources are not overloaded
Keeps your custom files intact if they haven’t been modified
Protecting Custom Files
If you have modified PriviMetrics code or want to prevent certain files from being overwritten, both manual update and Updater require special handling. You can create an ignore list:
Create a file called
ignore.xmlin your Updater folder:Use the following template to specify which files or directories the Updater should skip:
⚠️ Important: Files listed in ignore.xml will not be updated by the Updater. This protects your configuration, data, and customizations.
Tip: Always back up your PriviMetrics installation before updating, especially if you have modified core files manually.
Note: If you are using the Updater, backups are created automatically. You can access them here: https://yourdomain.com/path-to-privimetrics/updater/backups.php
This ensures you can safely restore your installation in case anything goes wrong during the update.